Get your music up to studio quality
It’s all very well having great ideas and getting them recorded and arranged, but if you want your music to sound professional, you’ll need to blend everything together successfully at the mixing/processing stage.
Unfortunately, the pitfalls when you’re doing this are many, and getting all the elements of your track to sit together is difficult. Fortunately, MusicRadar is on hand to give you 21 pearls of technical and creative wisdom…
1. There’s a very practical reason that you should start with heavy elements such as the kick drum and bass when mixing – headroom! Set your kick and bass levels so that they only register about a quarter of the way up the level meter when it’s set to 0dB. This will leave lots of room to boost later – and you’ll always want room to nudge your kick up!
2. Try to keep your master output level well below 0dB – peaking about halfway up the meter is fine – so as not to risk any digital clipping or distortion. In these days of noise-free digital mixing, you can always raise the level later before limiting it.
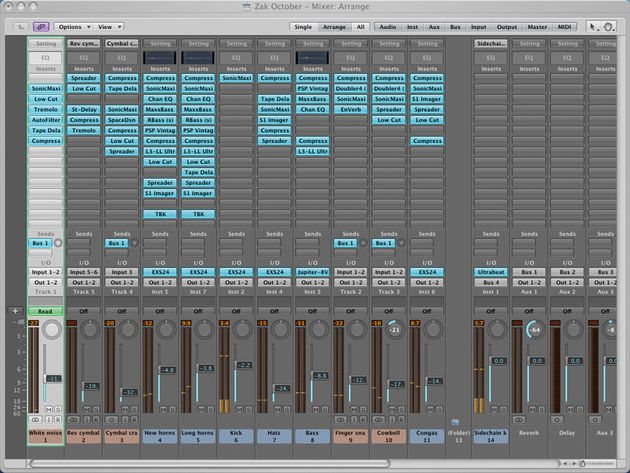
3. You can help different groups of sounds to gel coherently (drums or vocals, for example) by routing them to a bus and processing them as a whole. It’s also useful for keeping the CPU load down and makes gating and compressing the group easier.
4. Mixing is the one part of the creative production process where you need to have the volume quite loud, as you won’t actually hear the proper relationship between sounds otherwise – this is particularly true with dance music. Work in spurts to check this, though - don’t just leave it loud all the time. You can’t fix broken ears.
5. Be careful of any effect that makes a signal louder, as the volume increase alone can give the illusion of a ‘better’ sound. Compression is a good example of this. Louder isn’t necessarily better, so always be sure to A/B your new and old settings to make sure that you are actually improving the sound rather than just boosting it.
6. If you compress the life out of all the elements in your track then that’s exactly how your finished mix will sound too. And while this is a standard technique in dance music these days, even in that genre there are limits. So dial back the settings a little sometimes, and use sidechaining to add some bounce and life.
7. In the analogue mixing days it was common practice to place a compressor on the main output to keep the signal below 0dB and add a bit of weight, but with modern digital mixing you can keep things low enough not to peak and still preserve the range. Don’t risk squashing the life out of your music – leave those sorts of decisions for the mastering engineer.
“Always be sure to A/B your new and old settings to make sure that you are actually improving the sound rather than just boosting it.”
8. Before sending your track to anybody (or burning a CD), always check your mixdown back after bouncing. Even with software, little errors can creep in that aren’t audible during real-time playback. If you come across a glitch, rendering the problem section separately and pasting it into the mixdown will do the trick…
9. Always trust your ears first and foremost. Music isn’t for looking at, so if something doesn’t appear right onscreen, or looks like it has too many (or too few) effects, close your eyes (or switch off your monitor) and play it back. If it sounds right, it is right; if it sounds wrong… well, you figure it out!
10. Unlike with your final mix, you shouldn’t always shy away from overdriving the odd channel. We’re not suggesting that you max everything out into the red all the time, but if you have one or two elements sneaking into that range and they don’t sound bad (or sound better, even), then why worry? Trust your ears!
11. When two instruments share a range of frequencies (vocals and guitars, for example), apply an EQ cut to one to make the other pop through. For example, some attenuation in the 300Hz-3kHz range of your guitars and synths will help the vocal cut through.
12. The easiest way to home in on a problem frequency that needs cutting is to apply a boost using a parametric EQ and sweep the frequency back and forth until you hear the problem area get louder. Then use the Q control to narrow it down and, finally, turn the boost into a cut.
13. Many producers try to beef up the bass with low-shelving boost, but this can just make the sound muddy. Instead, try cutting out about 1dB with low shelving, then use a little bit of notch boost (1-3dB) and sweep the centre frequency between about 80Hz and 120Hz, as this is where the weight and punch of the bass is – the rest is just rumble!
14. Synthesizers are capable of throwing out some weird harmonics, so sometimes you might need to detune them slightly to make them sound right together. And this is even more true of samples, as they tend to have subtle sonic artefacts that can confuse things even further.
“When two instruments share a range of frequencies (vocals and guitars, for example), apply an EQ cut to one to make the other pop through.”
15. If you always use an effect as an insert, try using it on a send/return bus, and vice versa. It’s all too easy to settle into certain ways of working, but as producers, our sound will be defined by our techniques, so if these never change then neither will the sound of our music – and production should be about progression.
16. The last thing you want when mixing is the dreaded CPU overload, so to get rid of the problem it may well be worth bouncing down or freezing all of your parts as audio and then making final mix and processing adjustments. With certain software, doing this could arguably result in better signal quality, too.
17. The key to great sounding ambience is to use a couple of reverb buses – one each for bright and heavy sounds. Then use plenty of low EQ attenuation to keep things clean on the heavier sounds and trim off some of the top end on the brighter ones.
18. We’ve already said that you should always start your mixdown with the heaviest elements, but what next? Well, we reckon it’s lead sounds, such as vocals, synths and guitars. Get these right and then slide your other percussion up behind them – this way you won’t keep nudging the lead parts up to get them to fit with everything else.
19. Never neglect compression. Nothing upsets the balance of a mix quite like fluctuating volume levels. They make vocalists sound insecure and musicians sound clumsy, so use plenty of judicious compression to flatten the levels to consistency – sometimes two gentle compressors are smoother than one firm one.
20. Spend some time listening to the effect of various compression settings on different instruments. On vocals it can enhance breath noises, making them much more intimate; on guitars it can bring out the sound of fingers stroking strings or the rattle of hands on wood. All of these elements can be useful at times, but you do need to learn how to control them.
21. Headphones can be a very useful mixing tool (particularly in a bad monitoring environment, as they can give a good reference point without any reflections), but they simply cannot portray a stereo field or reproduce bass frequencies (even if they’re rated as low as 25Hz), so always finalise your mix on monitors
.
.
